Easy Accent Decorator
Dessert Decorating Tool
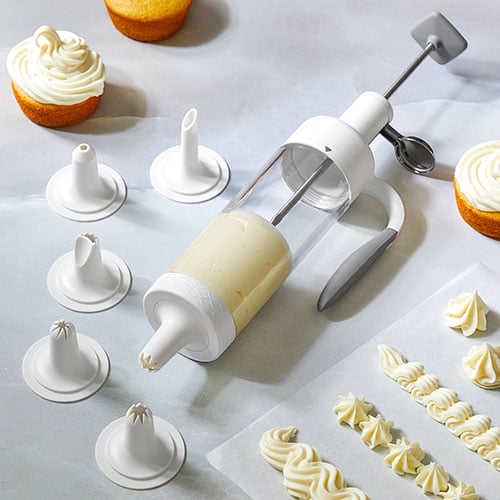
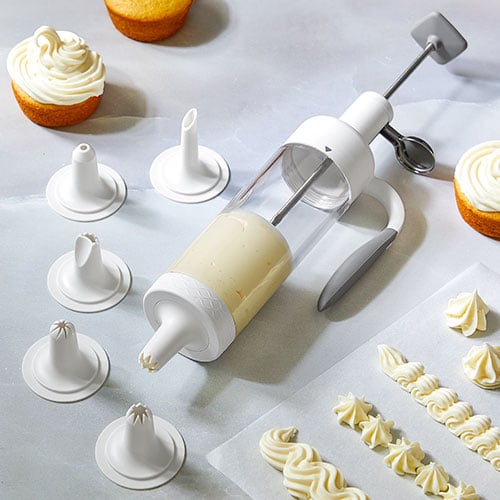
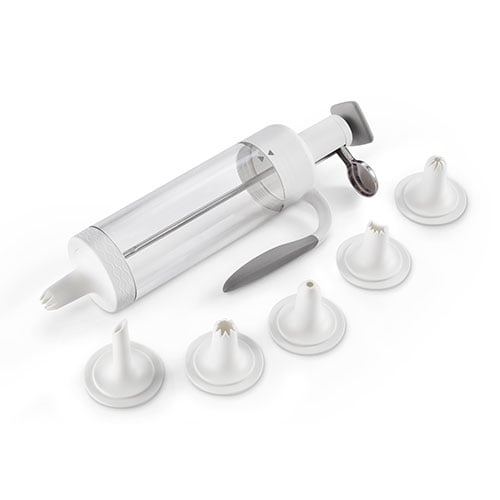
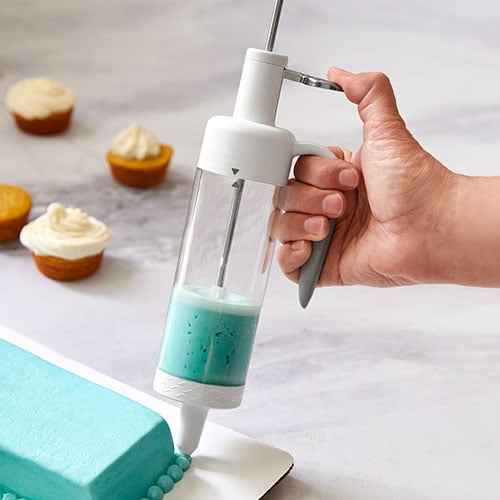
New! Express yourself with frosting designs worthy of a bakery. The ergonomic handle and soft-touch grip make it comfortable to hold even when tackling a cake covered in frosting flowers. And the sturdy stainless-steel thumb lever holds up to all the cupcake swirls you want to make with it.
When it comes to frosting designs, choose from six decorating tips that’ll cover all the basics. The Round Tip gives you outlines, writing, and beads. The Star Tip can do zigzags, rosettes, shells, and, of course, stars. The Half-Moon Shell Tip makes beautiful shells, too. The Drop Flower Tip produces dainty flowers that can make even a beginner feel like a cake boss. The Bismarck Tip can help take your desserts to the next level with filled cupcakes and éclairs.
There’s no need to waste good icing when you’re finished. Any leftover filling in the decorator can be saved in the refrigerator up to 24 hours. Let warm to room temperature before reusing. Once the icing is gone, all the parts go in the dishwasher for easy cleanup.
Product Details
- Holds 1¼ cups (300 mL) of icing or deviled egg filling
Warranty
- Three-year guarantee
-
Use & Care
Use & Care
Use & Care


SAFEGUARDS
- Not freezer-safe.
- Only intended for ingredients that are cold or room temperature. Do not place hot ingredients in this product.
- Don’t push the plunger when the barrel is empty; this will damage the product.
- Do not use frostings with mix-ins, such as sprinkles, as it may clog the tips.
CLEANING
- Wash before using for the first time; dishwasher-safe when placed away from the heating element. Place tips and coupler in the utensil holder.
USE AND CARE
TO USE
When assembling the decorator, the triangle indicators on the barrel and at the top should be aligned.
- Choose a decorating tip and insert it into the ring. Screw the ring onto the bottom of the barrel.
- Fill the barrel about two-thirds full. Pull the plunger up and then screw the handle onto the barrel.
- Grip the handle and place your thumb on the trigger. Press the trigger down.
- Disassemble before cleaning.
- For best results, use a thin icing, except when using the Drop Flower Tip.
- There are two basic positions for holding the decorator: at a 90° angle with the decorator positioned straight up, perpendicular to the surface, or at a 45° angle with the decorator slanted. See the table below.
- Left-handed decorators should reverse these directions. A left-handed person will decorate from right to left. The only exception is for writing or printing.
- Any leftover filling in the decorator can be saved in the refrigerator up to 24 hours. Let warm to room temperature before reusing.
Decorating Tips
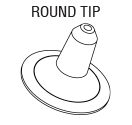
- Outline: Hold the decorator at a 45° angle. Touch the tip to the surface. Push the trigger downward, and icing will flow from the tip. Release the trigger to stop. After the area is outlined, squeeze out the icing in a zigzag motion to fill in area (optional).
- Print: Hold the decorator at a 45° angle with the tip resting lightly on the writing surface. The decorator should be slanted to the right for horizontal lines or toward you for vertical lines. Squeeze the trigger to release the icing in a straight line to begin the message. Release the trigger before you lift the decorator tip from the surface so a tail does not form.
- Write: Begin in the same fashion as printing but move your whole arm across the writing surface as you write.
- Beads: Hold the decorator at a 45° angle with the tip slightly above the surface. Squeeze the trigger to release the icing until a dot is formed on a base. Ease the pressure and draw the tip down, bringing the bead to a point. Repeat until the border is complete.
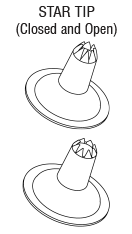
- Stars: Hold the decorator at a 90° angle with the tip slightly above the surface. Gently squeeze the trigger to form a star, stop pressing, and pull the decorator away. Repeat to fill an entire cake surface or just one area. Place the stars very close to each other so that no cake shows between the stars.
- Zigzags: Hold the decorator at a 45° angle to the surface. Guide the decorator in short up-and-down motions to form a zigzag pattern as you continue to squeeze the trigger.
- Rosettes: Hold the decorator at a 90° angle with the tip slightly above the surface. Squeeze the trigger and twist your wrist to the right in a circular motion to the starting point. Stop pressure and pull the tip away.
- Shells: Hold the decorator at a 45° angle with the tip slightly above the surface. Squeeze the trigger and lift the tip up slightly as icing builds and fans into a full base. Ease the pressure and pull the decorator to the right to make the tail. Work to your right starting the next shell near the tail of the previous shell.
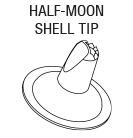
Follow shells instructions above. Half-moon shells do not have a tail and should be placed close to each other. 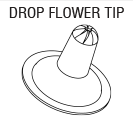
This is the easiest flower for a beginner. Use slightly stiffer icing and hold the decorator at a 90° angle with the tip touching the surface. Squeeze the trigger as you would for a star. To create a swirled flower, curve your wrist around to the left as you press the icing out. Release the pressure and lift the decorator upward. Add a dot to the center using the round tip. 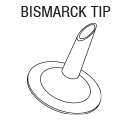
Use to easily fill cupcakes and éclairs. Gently insert the tip into the side of the pastry and squeeze the trigger to release the filling. Release the trigger before pulling the tip out. GUARANTEE
• Three-year guarantee for noncommercial use. Refer to website or sales receipt for details.Guarantee
Made in ChinaUse & Care


SAFEGUARDS
- Not freezer-safe.
- Only intended for ingredients that are cold or room temperature. Do not place hot ingredients in this product.
- Don’t push the plunger when the barrel is empty; this will damage the product.
- Do not use frostings with mix-ins, such as sprinkles, as it may clog the tips.
CLEANING
- Wash before using for the first time; dishwasher-safe when placed away from the heating element. Place tips and coupler in the utensil holder.
USE AND CARE
TO USE
When assembling the decorator, the triangle indicators on the barrel and at the top should be aligned.
- Choose a decorating tip and insert it into the ring. Screw the ring onto the bottom of the barrel.
- Fill the barrel about two-thirds full. Pull the plunger up and then screw the handle onto the barrel.
- Grip the handle and place your thumb on the trigger. Press the trigger down.
- Disassemble before cleaning.
- For best results, use a thin icing, except when using the Drop Flower Tip.
- There are two basic positions for holding the decorator: at a 90° angle with the decorator positioned straight up, perpendicular to the surface, or at a 45° angle with the decorator slanted. See the table below.
- Left-handed decorators should reverse these directions. A left-handed person will decorate from right to left. The only exception is for writing or printing.
- Any leftover filling in the decorator can be saved in the refrigerator up to 24 hours. Let warm to room temperature before reusing.
Decorating Tips

- Outline: Hold the decorator at a 45° angle. Touch the tip to the surface. Push the trigger downward, and icing will flow from the tip. Release the trigger to stop. After the area is outlined, squeeze out the icing in a zigzag motion to fill in area (optional).
- Print: Hold the decorator at a 45° angle with the tip resting lightly on the writing surface. The decorator should be slanted to the right for horizontal lines or toward you for vertical lines. Squeeze the trigger to release the icing in a straight line to begin the message. Release the trigger before you lift the decorator tip from the surface so a tail does not form.
- Write: Begin in the same fashion as printing but move your whole arm across the writing surface as you write.
- Beads: Hold the decorator at a 45° angle with the tip slightly above the surface. Squeeze the trigger to release the icing until a dot is formed on a base. Ease the pressure and draw the tip down, bringing the bead to a point. Repeat until the border is complete.

- Stars: Hold the decorator at a 90° angle with the tip slightly above the surface. Gently squeeze the trigger to form a star, stop pressing, and pull the decorator away. Repeat to fill an entire cake surface or just one area. Place the stars very close to each other so that no cake shows between the stars.
- Zigzags: Hold the decorator at a 45° angle to the surface. Guide the decorator in short up-and-down motions to form a zigzag pattern as you continue to squeeze the trigger.
- Rosettes: Hold the decorator at a 90° angle with the tip slightly above the surface. Squeeze the trigger and twist your wrist to the right in a circular motion to the starting point. Stop pressure and pull the tip away.
- Shells: Hold the decorator at a 45° angle with the tip slightly above the surface. Squeeze the trigger and lift the tip up slightly as icing builds and fans into a full base. Ease the pressure and pull the decorator to the right to make the tail. Work to your right starting the next shell near the tail of the previous shell.

Follow shells instructions above. Half-moon shells do not have a tail and should be placed close to each other. 
This is the easiest flower for a beginner. Use slightly stiffer icing and hold the decorator at a 90° angle with the tip touching the surface. Squeeze the trigger as you would for a star. To create a swirled flower, curve your wrist around to the left as you press the icing out. Release the pressure and lift the decorator upward. Add a dot to the center using the round tip. 
Use to easily fill cupcakes and éclairs. Gently insert the tip into the side of the pastry and squeeze the trigger to release the filling. Release the trigger before pulling the tip out. GUARANTEE
• Three-year guarantee for noncommercial use. Refer to website or sales receipt for details.Guarantee
Made in China


 Canada (en)
 Germany (de)
 Austria (de)