Quick Cooker
Pressure Cooker and Slow Cooker
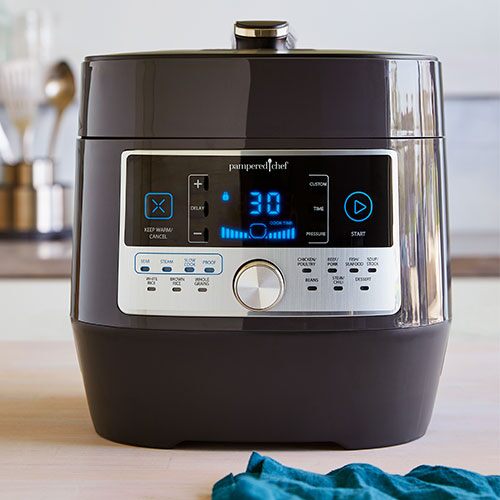
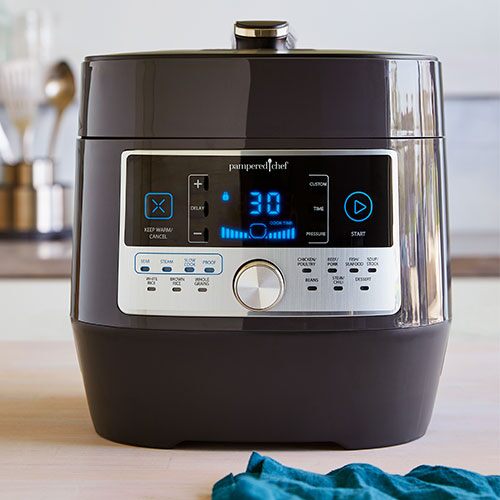
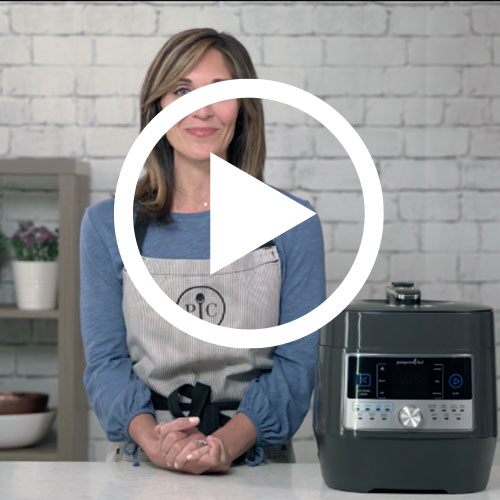
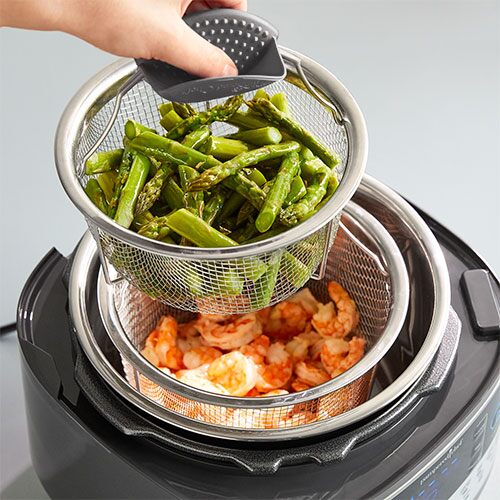
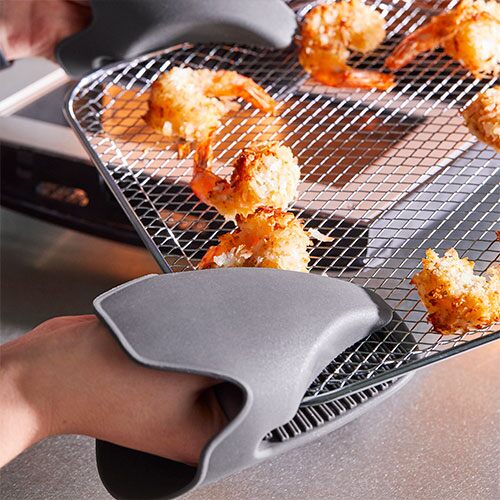
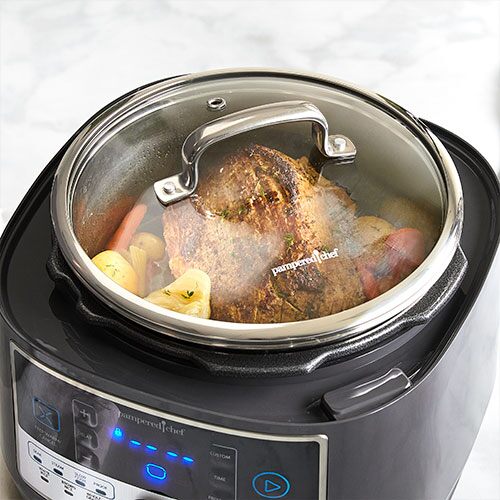
Make one-pot dinners fast with our Quick Cooker—Pampered Chef's 16-in-1 pressure cooker. Pressure cooking can reduce cook times by up to 70%, and you can even cook frozen foods without thawing. There are 16 preprogrammed settings for everything from meat, rice, and beans to desserts, so you can take the guesswork out of cooking.
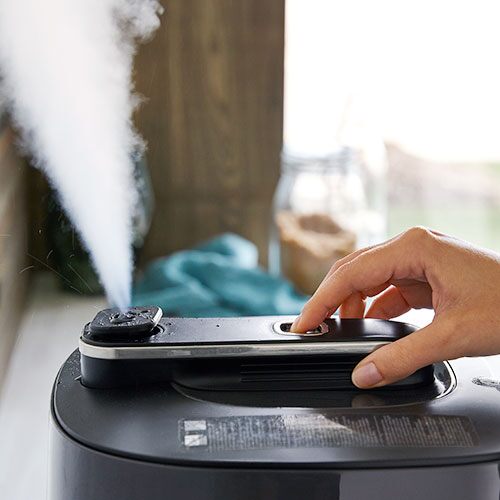
The Quick Cooker was designed with your safety in mind: The steam-release valve is positioned away from the button so your hands are away from hot steam, and it was designed to stay cool even when food is cooking. The carrying handles in the base let you securely move or store the Quick Cooker when it’s not in use.
Product Details
- 6-qt. (5.6-L) capacity
- 12" x 13" x 12½" (30 cm x 33 cm x 31 cm)
- Includes a wire rack, recipe book with recipes and cooking charts.
- 16 preprogrammed settings
- Stay-cool body
- Inner pot and silicone seal are dishwasher-safe
Warranty
- One-year guarantee for noncommercial use.
Recommended:
-
Use & Care
Use & Care
Use & Care

- Please read all instructions. Save these instructions.
- This unit is for household use, it is not intended for commercial use. Do not use outdoors.
- Do not place the unit on or near a hot gas or electric burner, or inside a heated oven.
- Keep out of the reach of children and people with disabilities.
- To protect against electrical shock, do not immerse or operate the unit, cord, or plugs in water or other liquid.
- Unplug from outlet when not in use and before cleaning. Allow to cool completely before cleaning, and before putting on or taking off parts.
- Do not operate the unit if any part of the base, lid, pot or plug is damaged or if the unit malfunctions or has been damaged in any manner. Call the Solution Center at (888) 687-2433 (United States) or (800) 342- 2433 (Canada) for replacement options.
- Only use accessories that are sold by Pampered Chef and are recommended for use with this unit. The use of accessory attachments not sold or recommended by Pampered Chef may cause injuries. Any accessory that has been damaged in any manner should not be used.
- Do not let cord hang over edge of a ledge and It should not touch hot surfaces.
- Do not use the Quick Cooker for anything other than the intended use as outlined in this use and care.
- Extreme caution must be used when moving this unit, especially if it contains hot contents.
- To disconnect, turn all cooking functions to “off,” then remove the plug from the wall outlet.
- Always check the pressure release devices for clogging before use. See p. 8 for directions on how to check it.
- Do not open the Quick Cooker until the unit has cooled and all internal pressure has been released. If the handle is difficult to turn, this indicates that the cooker is still pressurized—do not force it to open. Any pressure in the cooker can be hazardous. See Operating Instructions on the following pages.
PLEASE READ ALL INSTRUCTIONS THOROUGHLY


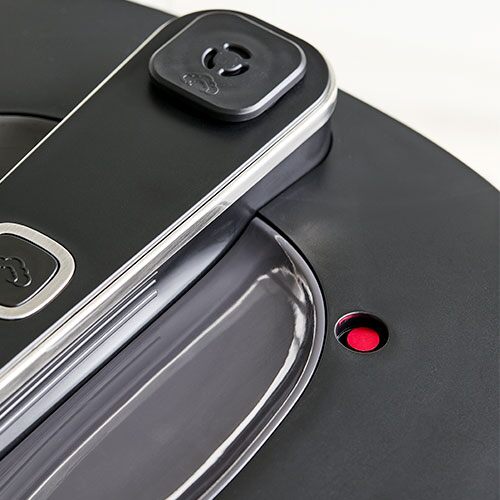
- Never force the lid open when in use or when contents are pressurized as indicated by the red pressure indicator.

- This unit releases hot steam. Keep everything away from the steam-release valve while the unit is in operation or while the unit is venting including hands, face, and body Additionally, position the steam release valve away from any overhang or walls.

- Do not move this unit while the unit is in operation or when the unit is pressurized.

- Never fill the unit over MAX level (⅔ full). When cooking foods that expand during cooking, such as rice or dried vegetables, do not fill the unit above the halfway point. Overfilling may cause a risk of clogging the steam-release valve cover and developing excess pressure. See “How to Use Menu Settings” for specific food instructions.
- The Quick Cooker cooks under pressure. Improper use may result in scalding injury. Make certain unit is properly closed before operating and all lid components are properly assembled. See Operating Instructions for assembly instructions.
- Spilled food can cause serious burns. Keep unit and cord away from children. Never drape cord over edge of counter, never use outlet below counter, and never use with an extension cord.
- A short power-supply cord is used to reduce the risk resulting from it being grabbed by children, becoming entangled in, or tripping over a longer cord.
- Never deep fry or pressure fry in the unit with oil. It is dangerous and may cause a thermal event, serious damage, or injury.

- During cooking, do not cover the steam-release valve with a cloth or other item.
- Do not use the inner pot in the oven or microwave, or on the stovetop or grill. Use of the inner pot on other appliances may cause deformations which can negatively affect future performance of the unit.
- Do not operate the unit on an unstable surface.
- Never operate the unit on or near flammable materials such as newspapers or paper plates.
- Keep unit and cord out of reach of children.
- Do not operate the unit near water or fire.
- Do not touch hot surfaces without an appropriate oven mitt on.
- Do not use non-Pampered Chef-authorized pots, lids or accessories.

- Do not put foreign objects into gaps and crevices of the unit. It is prohibited to insert utensils or other foreign matter into gaps or crevices. This may cause electric shock or other dangerous accidents.
- Do not attempt to modify or repair the Quick Cooker or any part inside the Quick Cooker, as this may cause electric shock, thermal event, or injury.
ELECTRICAL HAZARD - To reduce the risk of electric shock, cook only in the provided removable inner pot.
- Do not use anything other than a 120V- 60Hz power outlet. Failure to use AC 120V-60Hz electricity or dedicated electricity can cause electrical shock, fire, or other dangerous accidents
- Do not immerse, submerge, or sprinkle with liquids. Doing so could cause electric shock and electrical short.
- Persons with pacemakers or users of hearing aids or cochlear implants should consult with authorized medical personnel before use. Refer to the instructions of medical equipment providers.

- This unit has a polarized plug (one blade is wider than the other). To reduce the risk of electric shock, this plug is intended to fit into a polarized outlet only one way. If the plug does not fit fully into the outlet, reverse the plug. If it still does not fit, contact a qualified electrician.
- Do not attempt to modify the plug in any way.
- If the plug fits loosely into the outlet, or if the outlet feels warm, do not use that outlet.
- Do not insert or remove the plug with wet hands. In order to avoid injuries due to electric shock, make sure hands are dry before plugging and unplugging the unit.
- Do not plug into a power strip or an outlet with another appliance. The Quick Cooker should be used with a dedicated outlet. A grounded socket of more than 10A rated current shall be used alone. If shared with other appliances, the socket may cause electrical shock, fire, or other dangerous accidents.
- Always unplug when not in use. Otherwise, it may cause electrical leakage, fire, or failure.


- The steam icon must line up correctly to seal. Before use, make sure the steam icon on the vent faces the same direction as the release button.

- Never lift by the lid handle directly in order to avoid damage to the unit. Do not move the unit when the lid is open to avoid injury.

- Do not bend, kink, stretch, or compress the silicone seals, as this may cause the unit to fail or malfunction.
- Intended for countertop use only.
- Do not expose the unit to direct sunlight.
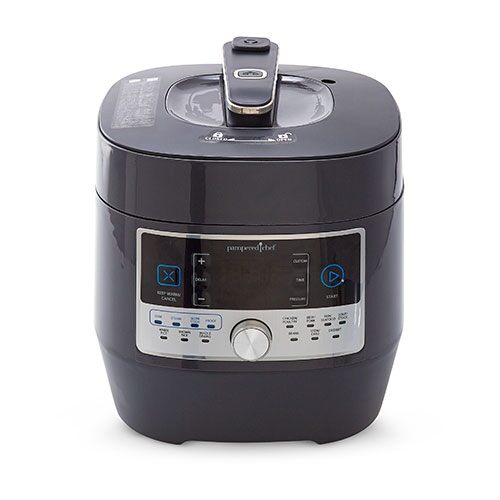
PARTS
Top of Lid

A. Steam-release valve
B. Pressure indicator
C. Steam-release button
D. Lid handle
Bottom of Lid

E. Outer lid
F. Silicone ring
G. Pressure indicator (interior)
H. Pressure indicator seal
I. Steam-release valve cover
Base

J. Heating element
K. Stainless steel inner pot (referred to as inner pot)
L. LED display
M. Menu knob
N. Carrying handles
O. Wire rack
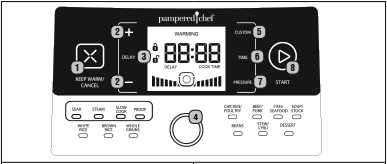
1. Keep Warm/Cancel Button
- In standby mode, press this button to enter the Keep Warm mode.
- Using this button, you can cancel any operation that the Quick Cooker is performing.
2. + /- Button
- Add or reduce cooking time and pressure.
3. Delay Button
- Once cooking setting has been selected, you can choose to delay the start of the cooking program.
4. Menu Knob
- Rotate the Menu knob to select a setting.
5. Custom Button
- Lets you manually select the amount of time and pressure.
6. Time Button
- Adjust the cooking time by pressing the TIME button and using the +/- buttons to change in 1-minute increments.
7. Pressure Button
- Choose a pressure level. Programmed settings do not allow you to adjust the pressure.
8. Start Button
- Press the START button to confirm the selection, and the Quick Cooker will begin to heat up.
CLEANING
- image WARNING: Before cleaning the unit, unplug the power cord and let the Quick Cooker cool completely.
- Lid is hand wash only.
- Body is wipe clean with a damp cloth.
- The inner pot, wire rack, and silicone ring are dishwasher-safe.
- Clean before using for the first time and after each use.
- Before cleaning the product, unplug the power cord and let the Quick Cooker cool completely.
- You may notice black shavings around lip of the base during the first several uses. This is normal. Just wipe off with a damp towel.
- To deep clean the lid and silicone ring: Place 2 cups (500 mL) of distilled white vinegar or water and 1 lemon rind in the inner pot and cook on the Steam setting for 2 minutes.
 IMPORTANT COOKING PRECAUTIONS
Before first use:
- Remove all packaging.
- Read through this document.
- Wipe the inner pot and inside of the lid with warm, soapy water, rinse, and dry thoroughly.
- Wipe down the exterior body with a clean, damp cloth.
- Clean the silicone ring in the dishwasher.
Before each use:

- Check the steam-release valve, steam-release valve cover, and pressure indicator for any obstructions.
- Make sure the steam-release valve and pressure indicator assembly are in the sealed position.
- Before locking the lid, make sure there is nothing inside the pot that can obstruct the lid. If the lid is obstructed, the lid can lock in place and will not be removable.
 CAUTION: Wipe the bottom exterior surface of the inner pot, as well as the heating element to confirm they are free of any foreign objects.
-
- Check the steam-release valve and cover for clogging before use. Do not cover the steam-release valve or pressure indicator.
- The unit should be oriented so that the exhaust does not vent directly onto kitchen cabinets. Steam may damage cabinets when the exhaust valve is opened, and steam is directly being released onto cabinets.
- Do not use if the silicone ring is damaged. Contact the Solution Center for replacement parts.
After cooking has started:
 WARNING: Do not open the Quick Cooker until after the cooking cycle has stopped, and all internal pressure has been released. If pressure indicator is up, the Quick Cooker is still pressurized. If the lid is difficult to open, this indicates that the cooker is still pressurized: DO NOT force it open. Any pressure in the cooker can be hazardous. Please see the Preparing to Cook section.
 - If steam is releasing through the steam-release valve and not pressurizing, ensure the lid is fully closed and the steam-release valve is in the seated position by pressing steam-release buttonuntil it is flush with handle.
- Upon reaching pressure, the lid may raise slightly, and a very slight gap will be noted between the lid and the base.
 CAUTION: If the Quick Cooker is moved or bumped during cooking, small bursts of steam may be released through steam-release valve.
After cooking is complete:
 WARNING: After cooking, use extreme caution when removing the lid. Always open the lid away from you to avoid skin contact with any heat or steam. Serious burns can result from steam inside the unit.
  CAUTION: If excessive spattering occurs when steam is manually released, allow contents to sit for 15 more minutes before manually releasing steam again.
  CAUTION: When opening the lid after cooking, do not touch the inner pot or cover inside with hands directly to avoid scalding.
  CAUTION: The stainless steel inner pot will be hot during and after cooking. Use a long-handled utensil when stirring and removing food.
Additional tips:
- If cooking at a higher altitude, a longer cooking time will be required. Please contact Pampered Chef if you have any questions regarding high-altitude cook times.
- Silicone ring may expand from heat after back-to-back usage, causing seal to fit loosely, and preventing the pot from coming up to pressure. Place in cold water for a few minutes to bring it back to normal shape.
- You may notice black shavings around lip of the base during the first several uses of the Quick Cooker. This is normal. Simply wipe off with a dampened towel.
PREPARING TO COOK
1. Open the lid.
- Holding the lid handle, rotate approximately ⅛ turn counter clockwise until it stops. You will hear musical notes (if the function is on). Lift the lid up to remove (you will hear the same musical notes if the function is on).
2. Check that all parts on the lid are assembled correctly. Refer to "Before Each Use" in the previous section. 
3. Fill the inner pot.
- The total amount of food and water should NEVER exceed the maximum level marking on the inner pot.
- When cooking foods that expand during cooking, do not fill past the ½ marking on the inner pot.
- For pressurized cooking, there must be at least 1 cup (250 mL) of water. If you’re cooking food that will absorb liquid, you may want to add a little more.
 WARNING: Overfilling may clog the steam-release valve cover and develop excess pressure. This could also cause spills, damage to the unit, or other dangerous accidents.

4. Put lid on and close completely.
- Hold the lid handle and place the lid down offset by ⅛ turn counter clockwise. When placing the lid on, you will hear musical notes again (if the function is on). Once the lid is seated, turn it clockwise until it is closed (musical notes will play again, if the function is on).
- If you’re using the Quick Cooker under a pressurized setting, the lid must be on and locked in order to cook. If the lid is not locked in place, the cooker will not be able to start.
- If you’re using the Quick Cooker in Sear, Keep Warm, or Slow Cook mode, it will work without lid on.

5. Ensure lid steam-release valve is open or closed (depending on your recipe/use).
A. Any pressurized setting requires the steam-release valve to be closed. Ensure the steam-release button is flush to handle and the valve is seated correctly.
B. For settings that don’t use pressure (Keep Warm, Slow Cook, Sear, Proof) the steam-release valve may be opened. Ensure the steam-release button is pressed and sits below the handle and the steam-release valve is up.
6. Position the steam valve away from any overhang or walls. COOKER MODES
The Quick Cooker has three modes that are shown on the LED display and function indicators.

Standby mode:
The LED display will show TIME with 4 dashes (- - - -) and pressure as an outline of the Quick Cooker.

Preheating mode:
The LED display will show TIME with rectangular boxes and pressure as an outline of the Quick Cooker.

Cooking mode:
Once your setting has started, the LED display will show the remaining cook time and pressure setting (if applicable).

Keep warm mode:
The LED display will show WARMING. After every cooking cycle is complete (except Proof setting), the Quick Cooker will enter Keep warm mode, where it will keep your food warm until you’re ready to eat. Once Keep warm mode starts, the timer will count the minutes it has been warming.
HOW TO USE CUSTOM SETTINGS
- To set your own custom cook time, press the CUSTOM button, then the TIME button. Use the +/- buttons to change the time.
- To set a custom pressure, press the CUSTOM button, then the PRESSURE button. Use the +/- buttons to change the pressure level.

Low pressure 
High pressure 1. Once your time and pressure are set, press START.
HOW TO USE MENU SETTINGS
- Follow steps in Preparing to Cook section (p. 9).
- Plug in the unit. You will hear a beep and see 4 dashes across the LED display. Ensure the Quick Cooker is plugged into its own dedicated outlet.
- Turn the menu knob to select your setting (see chart below). Once the blue light is under the desired setting, it will show the cook time on the LED display. Press START or adjust the cook time, if needed.
- To change cook time, press TIME, then use +/- buttons to adjust. Once the time is set, press START.
- You can adjust the time, but not the pressure. If you would like to adjust the pressure, use a custom setting. Refer to How to Use Custom Settings.
Setting Preset Time at Pressure (Default) Pressure Setting (Cannot be changed) Notes Sear 20 minutes N/A - Use for open-lid searing, browning, or simmering.
- After pressing START, it will take about 3–5 minutes for the inner pot to heat up.
Steam 15 minutes 4 - Cook vegetables and reheat food, or hard-cook eggs using a wire rack.
- For fresh or frozen vegetables, use 1 cup (250 mL) of water. The steam time will vary depending on the vegetable. See the Vegetable Cooking Guide in the recipe book for details.
- We recommend using manual release so food cooks properly. Natural release can overcook food.
Slow Cook 4 hours N/A - Use as a conventional slow cooker.
Proof 30 minutes N/A - Use to proof dough before baking.
- When the setting finishes, the cooker will beep and go into the standby mode for the remaining time.
Chicken/Poultry 15 minutes 7 - Timing is based on bone-in chicken pieces but can be adjusted based on your recipe.
Beef/Pork 35 minutes 7 - Timing is based on a 2-lb. (1-kg) roast but can be adjusted based on your recipe and/or cut.
Fish/Seafood 3 minutes 1 - Timing is based on 1"–2"- (2.5–5-cm-) thick fish fillets but can be adjusted based on your recipe and/or cut.
Soup/Stock 30 minutes 7 - Timing is based on homemade stocks but can be adjusted based on your recipe.
White Rice 4 minutes 1 - Timing is based on 1 cup (250 mL) of long grain white rice, but can be adjusted based on your recipe. Allow rice to naturally release for 10 minutes before pressing the steam-release button. If foam comes out of the vent when releasing steam, use an oven mitt to press the steam-release button to close the vent and wait 10 minutes before attempting to release steam again.
 WARNING: Do not fill the pot more than halfway when cooking rice.
Brown Rice 15 minutes 7 - Timing is based on 1 cup (250 mL) of long grain brown rice, but can be adjusted based on your recipe. Allow rice to naturally release for 10 minutes before pressing the steam-release button. If foam comes out of the vent when releasing steam, use an oven mitt to press the steam-release button to close the vent and wait 10 minutes before attempting to release steam again.
 WARNING: Do not fill the pot more than halfway when cooking rice.
Whole Grains 10 minutes 7 - Timing is based on 1 cup (250 mL) of steel-cut oats, but can be adjusted based on your recipe.
- Cooking times for other grains vary greatly. See the Grain Cooking Guide in the recipe book for details.
Allow grains to naturally release for 10 minutes before pressing the steam-release button. If foam comes out of the vent when releasing steam, use an oven mitt to press the steam-release button to close the vent and wait 10 minutes before attempting to release steam again. WARNING: Do not fill the pot more than halfway when cooking rice.
Beans 25 minutes 4 - Timing is based on 1 cup (250 mL) of black beans, navy beans, and pinto beans, but can be adjusted based on your recipe.
- Cooking times for other beans vary greatly. See the Bean Cooking Guide in the recipe book for details.
Stew/Chili 40 minutes 7 - Timing is based on cut-up beef pot roast, but can be adjusted based on your recipe.
Dessert 40 minutes 2 - Timing is based on cheesecake but can be adjusted based on your recipe.
Note: If your recipe calls for more than the time shown above, you can adjust the time. Refer to How to Use Custom Settings.
4. Four dashes will move in a circular pattern on LED display. This notes that the unit is coming up to pressure.
- As the pressure increases inside the unit, it is perfectly normal for traces of steam to escape from the steam-release valve until the pressure indicator pops up. (Keep clear of debris.)
- During pressure buildup/cooking, the cooker may make low clicking sounds. This is normal as the heating element is switching on and off.
5. Once the cooker reaches pressure, the LED display will change to show the cook time.
6. When cooking is complete, 3 audible beeps will occur, and the cooker will switch to Keep Warm mode (except Proof setting). For settings under pressure, you can release pressure in one of the two ways at this time:
- Natural release occurs when the cooking cycle is complete. The Quick Cooker will naturally depressurize as it cools.
- After letting the Quick Cooker naturally release for at least 10 minutes, manually release any additional pressure by pressing the steam-release button.
- If foam comes out of the steam-release valve, press the steam-release button again to close the valve and let the Quick Cooker naturally release for an additional 10 minutes before attempting to manually release again.
- Manual release occurs when you press the steam-release button to release pressure right after cooking is complete.
- If foam comes out of the steam-release valve, press the steam-release button again to close the valve and let the Quick Cooker naturally release for an additional 10 minutes before attempting to manually release again.
 WARNING: After Natural or Manual release, ensure the pressure indicator is down before attempting to open the lid.
7. Press KEEP WARM/CANCEL one time to start Keep Warm mode. The Quick Cooker will remain in Keep Warm mode for up to 4 hours. Press KEEP WARM/CANCEL two times to stop cooking.
OTHER SETTINGS
Delay Cooking
- The Quick Cooker’s Delay Cooking feature lets you schedule a cooking cycle up to 24 hours in advance. This setting works for most settings, as well as custom cooking. You cannot delay Sear, Keep Warm, or Proof settings.
- Select your desired setting or a custom cooking function.
- Press DELAY. The Delay timer defaults to 30 minutes, but you can use the +/- button to adjust.
- Press START. The timer will begin counting down. When the timer reaches zero, it will start the cooking cycle you previously set. Once the cooking cycle is complete, it will automatically switch to Keep Warm mode.
Tips:
- Keep food safety in mind during the delayed start time, as meat, fish, and other perishable foods may spoil or cause illness if delayed for too long at room temperature.
- The Delay time is the time it will take for the Quick Cooker to start the cooking cycle, and does not consider the amount of time it will take to initially heat up the food or release pressure.
Keep Warm
After every cooking cycle is complete (except Proof mode), the Quick Cooker will enter Keep Warm mode, where it will keep your food warm until you’re ready to eat. You will know that the cooking cycle is complete, and warming has begun, when the LED display shows WARMING. The timer will count the minutes that it has been warming for.
You can manually start Keep Warm mode by pressing the KEEP WARM/CANCEL button when in standby mode.
Tips:
- The maximum time the Quick Cooker will stay in Keep Warm mode is 4 hours. After 4 hours, the Quick Cooker will go into Standby mode.
- Foods like rice may overcook or burn on the bottom if held in Keep Warm mode for too long.
TROUBLESHOOTING
The cases in the following tables do not always indicate a faulty cooker. Problem Possible Reason Solution It's difficult to close the lid. Pressure indicator is stuck. Reposition the pressure indicator and try to close the lid again. Silicone ringis not installed properly. Reposition the silicone ring and try to close the lid again. It's difficult to open the lid. The Quick Cooker is still under pressure. Open the lid after the pressure is completely released. Press the steam-release button to release remaining pressure. If no steam comes out after manual release, wait at least 30 minutes after unplugging the unit to attempt to open. If the lid is ever difficult to remove, assume that the unit is still pressurized and do not force the lid open. The pressure indicator is stuck. Contact Pampered Chef at (888) 687-2433 (United States) or (800) 342-2433 (Canada) for assistance. Steam is leaking from the side of the lid. Either the silicone ringis not in place or is improperly installed. Replace or reinstall the silicone ring. There is food debris attached to the silicone ring. Clean the silicone ring and reinstall properly. The silicone ring is damaged. Replace the silicone ring. Back-to-back uses have caused the silicone ringto expand. Remove the silicone ring from lid and place in ice water for a few minutes, drain, and pat dry to replace under lid. Steam is leaking from pressure indicator.
Note: Some steam will leak until cooker comes up to pressure.
There is food debris on the pressure indicator seal. Clean the pressure indicator seal and reinstall properly. The pressure indicator sealis worn out. Contact Solutions Center for replacement seal kit. The lid is not fully closed. Close the lid completely. The pressure indicator won't rise. There's not enough food or water in the inner pot. Add more food and water according to your recipe. Steam is leaking out of one of the seals. Check that all seals are clean, damage free, and have been properly assembled. Steam is leaking from the steam-release valve. Steam-release button is not in the correct position. Be sure that steam-release button is not pushed down. Steam-release valve is not sealing. Disassemble and clean the steam-release valve. Cannot get Quick Cooker to hold pressure. Contact the Solutions Center. Steam continuously comes out from the steam-release valve. The steam-release valveis not in the sealed position. Reposition the steam-release valve. Disassemble and clean the steam-release valve. The electronic pressure control system is malfunctioning. Cease use and unplug the unit. Contact the Solutions Center. The heating element is not heating food. The lid is not closed completely. Attempt to close the lid again. The heating elementfailed. Contact the Solutions Center. Circuit failure Contact the Solutions Center. C1/C2 code is appearing on screen. Bottom sensor failed. Contact the Solutions Center. C5 code is appearing on screen. The temperature of the bottom sensor is too high. Unplug the power supply, and after cooling, switch on again. If product still fails, contact the Solutions Center. C6 code appearing on screen. Pressure switch failure. Contact the Solutions Center. Food is undercooked. There is too little water. Add water accordingly. Rotate Menu Knob to Sear and simmer until desired doneness. Adjust the recipe next time you make this recipe. The cover was opened prematurely. After the cooking cycle completes, leave the cover on for 5 minutes. Food is overcooked. Food was in the Quick Cooker for too long. Adjust cooking time the next time you make the recipe. GUARANTEE
- One-year guarantee for noncommercial use. Refer to sales receipt for details.
Made in China
Use & Care

- Please read all instructions. Save these instructions.
- This unit is for household use, it is not intended for commercial use. Do not use outdoors.
- Do not place the unit on or near a hot gas or electric burner, or inside a heated oven.
- Keep out of the reach of children and people with disabilities.
- To protect against electrical shock, do not immerse or operate the unit, cord, or plugs in water or other liquid.
- Unplug from outlet when not in use and before cleaning. Allow to cool completely before cleaning, and before putting on or taking off parts.
- Do not operate the unit if any part of the base, lid, pot or plug is damaged or if the unit malfunctions or has been damaged in any manner. Call the Solution Center at (888) 687-2433 (United States) or (800) 342- 2433 (Canada) for replacement options.
- Only use accessories that are sold by Pampered Chef and are recommended for use with this unit. The use of accessory attachments not sold or recommended by Pampered Chef may cause injuries. Any accessory that has been damaged in any manner should not be used.
- Do not let cord hang over edge of a ledge and It should not touch hot surfaces.
- Do not use the Quick Cooker for anything other than the intended use as outlined in this use and care.
- Extreme caution must be used when moving this unit, especially if it contains hot contents.
- To disconnect, turn all cooking functions to “off,” then remove the plug from the wall outlet.
- Always check the pressure release devices for clogging before use. See p. 8 for directions on how to check it.
- Do not open the Quick Cooker until the unit has cooled and all internal pressure has been released. If the handle is difficult to turn, this indicates that the cooker is still pressurized—do not force it to open. Any pressure in the cooker can be hazardous. See Operating Instructions on the following pages.
PLEASE READ ALL INSTRUCTIONS THOROUGHLY


- Never force the lid open when in use or when contents are pressurized as indicated by the red pressure indicator.

- This unit releases hot steam. Keep everything away from the steam-release valve while the unit is in operation or while the unit is venting including hands, face, and body Additionally, position the steam release valve away from any overhang or walls.

- Do not move this unit while the unit is in operation or when the unit is pressurized.

- Never fill the unit over MAX level (⅔ full). When cooking foods that expand during cooking, such as rice or dried vegetables, do not fill the unit above the halfway point. Overfilling may cause a risk of clogging the steam-release valve cover and developing excess pressure. See “How to Use Menu Settings” for specific food instructions.
- The Quick Cooker cooks under pressure. Improper use may result in scalding injury. Make certain unit is properly closed before operating and all lid components are properly assembled. See Operating Instructions for assembly instructions.
- Spilled food can cause serious burns. Keep unit and cord away from children. Never drape cord over edge of counter, never use outlet below counter, and never use with an extension cord.
- A short power-supply cord is used to reduce the risk resulting from it being grabbed by children, becoming entangled in, or tripping over a longer cord.
- Never deep fry or pressure fry in the unit with oil. It is dangerous and may cause a thermal event, serious damage, or injury.

- During cooking, do not cover the steam-release valve with a cloth or other item.
- Do not use the inner pot in the oven or microwave, or on the stovetop or grill. Use of the inner pot on other appliances may cause deformations which can negatively affect future performance of the unit.
- Do not operate the unit on an unstable surface.
- Never operate the unit on or near flammable materials such as newspapers or paper plates.
- Keep unit and cord out of reach of children.
- Do not operate the unit near water or fire.
- Do not touch hot surfaces without an appropriate oven mitt on.
- Do not use non-Pampered Chef-authorized pots, lids or accessories.

- Do not put foreign objects into gaps and crevices of the unit. It is prohibited to insert utensils or other foreign matter into gaps or crevices. This may cause electric shock or other dangerous accidents.
- Do not attempt to modify or repair the Quick Cooker or any part inside the Quick Cooker, as this may cause electric shock, thermal event, or injury.
ELECTRICAL HAZARD - To reduce the risk of electric shock, cook only in the provided removable inner pot.
- Do not use anything other than a 120V- 60Hz power outlet. Failure to use AC 120V-60Hz electricity or dedicated electricity can cause electrical shock, fire, or other dangerous accidents
- Do not immerse, submerge, or sprinkle with liquids. Doing so could cause electric shock and electrical short.
- Persons with pacemakers or users of hearing aids or cochlear implants should consult with authorized medical personnel before use. Refer to the instructions of medical equipment providers.

- This unit has a polarized plug (one blade is wider than the other). To reduce the risk of electric shock, this plug is intended to fit into a polarized outlet only one way. If the plug does not fit fully into the outlet, reverse the plug. If it still does not fit, contact a qualified electrician.
- Do not attempt to modify the plug in any way.
- If the plug fits loosely into the outlet, or if the outlet feels warm, do not use that outlet.
- Do not insert or remove the plug with wet hands. In order to avoid injuries due to electric shock, make sure hands are dry before plugging and unplugging the unit.
- Do not plug into a power strip or an outlet with another appliance. The Quick Cooker should be used with a dedicated outlet. A grounded socket of more than 10A rated current shall be used alone. If shared with other appliances, the socket may cause electrical shock, fire, or other dangerous accidents.
- Always unplug when not in use. Otherwise, it may cause electrical leakage, fire, or failure.


- The steam icon must line up correctly to seal. Before use, make sure the steam icon on the vent faces the same direction as the release button.

- Never lift by the lid handle directly in order to avoid damage to the unit. Do not move the unit when the lid is open to avoid injury.

- Do not bend, kink, stretch, or compress the silicone seals, as this may cause the unit to fail or malfunction.
- Intended for countertop use only.
- Do not expose the unit to direct sunlight.
PARTS
Top of Lid

A. Steam-release valve
B. Pressure indicator
C. Steam-release button
D. Lid handle
Bottom of Lid

E. Outer lid
F. Silicone ring
G. Pressure indicator (interior)
H. Pressure indicator seal
I. Steam-release valve cover
Base

J. Heating element
K. Stainless steel inner pot (referred to as inner pot)
L. LED display
M. Menu knob
N. Carrying handles
O. Wire rack

1. Keep Warm/Cancel Button
- In standby mode, press this button to enter the Keep Warm mode.
- Using this button, you can cancel any operation that the Quick Cooker is performing.
2. + /- Button
- Add or reduce cooking time and pressure.
3. Delay Button
- Once cooking setting has been selected, you can choose to delay the start of the cooking program.
4. Menu Knob
- Rotate the Menu knob to select a setting.
5. Custom Button
- Lets you manually select the amount of time and pressure.
6. Time Button
- Adjust the cooking time by pressing the TIME button and using the +/- buttons to change in 1-minute increments.
7. Pressure Button
- Choose a pressure level. Programmed settings do not allow you to adjust the pressure.
8. Start Button
- Press the START button to confirm the selection, and the Quick Cooker will begin to heat up.
CLEANING
- image WARNING: Before cleaning the unit, unplug the power cord and let the Quick Cooker cool completely.
- Lid is hand wash only.
- Body is wipe clean with a damp cloth.
- The inner pot, wire rack, and silicone ring are dishwasher-safe.
- Clean before using for the first time and after each use.
- Before cleaning the product, unplug the power cord and let the Quick Cooker cool completely.
- You may notice black shavings around lip of the base during the first several uses. This is normal. Just wipe off with a damp towel.
- To deep clean the lid and silicone ring: Place 2 cups (500 mL) of distilled white vinegar or water and 1 lemon rind in the inner pot and cook on the Steam setting for 2 minutes.
 IMPORTANT COOKING PRECAUTIONS
Before first use:
- Remove all packaging.
- Read through this document.
- Wipe the inner pot and inside of the lid with warm, soapy water, rinse, and dry thoroughly.
- Wipe down the exterior body with a clean, damp cloth.
- Clean the silicone ring in the dishwasher.
Before each use:

- Check the steam-release valve, steam-release valve cover, and pressure indicator for any obstructions.
- Make sure the steam-release valve and pressure indicator assembly are in the sealed position.
- Before locking the lid, make sure there is nothing inside the pot that can obstruct the lid. If the lid is obstructed, the lid can lock in place and will not be removable.
 CAUTION: Wipe the bottom exterior surface of the inner pot, as well as the heating element to confirm they are free of any foreign objects.
-
- Check the steam-release valve and cover for clogging before use. Do not cover the steam-release valve or pressure indicator.
- The unit should be oriented so that the exhaust does not vent directly onto kitchen cabinets. Steam may damage cabinets when the exhaust valve is opened, and steam is directly being released onto cabinets.
- Do not use if the silicone ring is damaged. Contact the Solution Center for replacement parts.
After cooking has started:
 WARNING: Do not open the Quick Cooker until after the cooking cycle has stopped, and all internal pressure has been released. If pressure indicator is up, the Quick Cooker is still pressurized. If the lid is difficult to open, this indicates that the cooker is still pressurized: DO NOT force it open. Any pressure in the cooker can be hazardous. Please see the Preparing to Cook section.
 - If steam is releasing through the steam-release valve and not pressurizing, ensure the lid is fully closed and the steam-release valve is in the seated position by pressing steam-release buttonuntil it is flush with handle.
- Upon reaching pressure, the lid may raise slightly, and a very slight gap will be noted between the lid and the base.
 CAUTION: If the Quick Cooker is moved or bumped during cooking, small bursts of steam may be released through steam-release valve.
After cooking is complete:
 WARNING: After cooking, use extreme caution when removing the lid. Always open the lid away from you to avoid skin contact with any heat or steam. Serious burns can result from steam inside the unit.
  CAUTION: If excessive spattering occurs when steam is manually released, allow contents to sit for 15 more minutes before manually releasing steam again.
  CAUTION: When opening the lid after cooking, do not touch the inner pot or cover inside with hands directly to avoid scalding.
  CAUTION: The stainless steel inner pot will be hot during and after cooking. Use a long-handled utensil when stirring and removing food.
Additional tips:
- If cooking at a higher altitude, a longer cooking time will be required. Please contact Pampered Chef if you have any questions regarding high-altitude cook times.
- Silicone ring may expand from heat after back-to-back usage, causing seal to fit loosely, and preventing the pot from coming up to pressure. Place in cold water for a few minutes to bring it back to normal shape.
- You may notice black shavings around lip of the base during the first several uses of the Quick Cooker. This is normal. Simply wipe off with a dampened towel.
PREPARING TO COOK
1. Open the lid.
- Holding the lid handle, rotate approximately ⅛ turn counter clockwise until it stops. You will hear musical notes (if the function is on). Lift the lid up to remove (you will hear the same musical notes if the function is on).
2. Check that all parts on the lid are assembled correctly. Refer to "Before Each Use" in the previous section. 
3. Fill the inner pot.
- The total amount of food and water should NEVER exceed the maximum level marking on the inner pot.
- When cooking foods that expand during cooking, do not fill past the ½ marking on the inner pot.
- For pressurized cooking, there must be at least 1 cup (250 mL) of water. If you’re cooking food that will absorb liquid, you may want to add a little more.
 WARNING: Overfilling may clog the steam-release valve cover and develop excess pressure. This could also cause spills, damage to the unit, or other dangerous accidents.

4. Put lid on and close completely.
- Hold the lid handle and place the lid down offset by ⅛ turn counter clockwise. When placing the lid on, you will hear musical notes again (if the function is on). Once the lid is seated, turn it clockwise until it is closed (musical notes will play again, if the function is on).
- If you’re using the Quick Cooker under a pressurized setting, the lid must be on and locked in order to cook. If the lid is not locked in place, the cooker will not be able to start.
- If you’re using the Quick Cooker in Sear, Keep Warm, or Slow Cook mode, it will work without lid on.

5. Ensure lid steam-release valve is open or closed (depending on your recipe/use).
A. Any pressurized setting requires the steam-release valve to be closed. Ensure the steam-release button is flush to handle and the valve is seated correctly.
B. For settings that don’t use pressure (Keep Warm, Slow Cook, Sear, Proof) the steam-release valve may be opened. Ensure the steam-release button is pressed and sits below the handle and the steam-release valve is up.
6. Position the steam valve away from any overhang or walls. COOKER MODES
The Quick Cooker has three modes that are shown on the LED display and function indicators.

Standby mode:
The LED display will show TIME with 4 dashes (- - - -) and pressure as an outline of the Quick Cooker.

Preheating mode:
The LED display will show TIME with rectangular boxes and pressure as an outline of the Quick Cooker.

Cooking mode:
Once your setting has started, the LED display will show the remaining cook time and pressure setting (if applicable).

Keep warm mode:
The LED display will show WARMING. After every cooking cycle is complete (except Proof setting), the Quick Cooker will enter Keep warm mode, where it will keep your food warm until you’re ready to eat. Once Keep warm mode starts, the timer will count the minutes it has been warming.
HOW TO USE CUSTOM SETTINGS
- To set your own custom cook time, press the CUSTOM button, then the TIME button. Use the +/- buttons to change the time.
- To set a custom pressure, press the CUSTOM button, then the PRESSURE button. Use the +/- buttons to change the pressure level.

Low pressure 
High pressure 1. Once your time and pressure are set, press START.
HOW TO USE MENU SETTINGS
- Follow steps in Preparing to Cook section (p. 9).
- Plug in the unit. You will hear a beep and see 4 dashes across the LED display. Ensure the Quick Cooker is plugged into its own dedicated outlet.
- Turn the menu knob to select your setting (see chart below). Once the blue light is under the desired setting, it will show the cook time on the LED display. Press START or adjust the cook time, if needed.
- To change cook time, press TIME, then use +/- buttons to adjust. Once the time is set, press START.
- You can adjust the time, but not the pressure. If you would like to adjust the pressure, use a custom setting. Refer to How to Use Custom Settings.
Setting Preset Time at Pressure (Default) Pressure Setting (Cannot be changed) Notes Sear 20 minutes N/A - Use for open-lid searing, browning, or simmering.
- After pressing START, it will take about 3–5 minutes for the inner pot to heat up.
Steam 15 minutes 4 - Cook vegetables and reheat food, or hard-cook eggs using a wire rack.
- For fresh or frozen vegetables, use 1 cup (250 mL) of water. The steam time will vary depending on the vegetable. See the Vegetable Cooking Guide in the recipe book for details.
- We recommend using manual release so food cooks properly. Natural release can overcook food.
Slow Cook 4 hours N/A - Use as a conventional slow cooker.
Proof 30 minutes N/A - Use to proof dough before baking.
- When the setting finishes, the cooker will beep and go into the standby mode for the remaining time.
Chicken/Poultry 15 minutes 7 - Timing is based on bone-in chicken pieces but can be adjusted based on your recipe.
Beef/Pork 35 minutes 7 - Timing is based on a 2-lb. (1-kg) roast but can be adjusted based on your recipe and/or cut.
Fish/Seafood 3 minutes 1 - Timing is based on 1"–2"- (2.5–5-cm-) thick fish fillets but can be adjusted based on your recipe and/or cut.
Soup/Stock 30 minutes 7 - Timing is based on homemade stocks but can be adjusted based on your recipe.
White Rice 4 minutes 1 - Timing is based on 1 cup (250 mL) of long grain white rice, but can be adjusted based on your recipe. Allow rice to naturally release for 10 minutes before pressing the steam-release button. If foam comes out of the vent when releasing steam, use an oven mitt to press the steam-release button to close the vent and wait 10 minutes before attempting to release steam again.
 WARNING: Do not fill the pot more than halfway when cooking rice.
Brown Rice 15 minutes 7 - Timing is based on 1 cup (250 mL) of long grain brown rice, but can be adjusted based on your recipe. Allow rice to naturally release for 10 minutes before pressing the steam-release button. If foam comes out of the vent when releasing steam, use an oven mitt to press the steam-release button to close the vent and wait 10 minutes before attempting to release steam again.
 WARNING: Do not fill the pot more than halfway when cooking rice.
Whole Grains 10 minutes 7 - Timing is based on 1 cup (250 mL) of steel-cut oats, but can be adjusted based on your recipe.
- Cooking times for other grains vary greatly. See the Grain Cooking Guide in the recipe book for details.
Allow grains to naturally release for 10 minutes before pressing the steam-release button. If foam comes out of the vent when releasing steam, use an oven mitt to press the steam-release button to close the vent and wait 10 minutes before attempting to release steam again. WARNING: Do not fill the pot more than halfway when cooking rice.
Beans 25 minutes 4 - Timing is based on 1 cup (250 mL) of black beans, navy beans, and pinto beans, but can be adjusted based on your recipe.
- Cooking times for other beans vary greatly. See the Bean Cooking Guide in the recipe book for details.
Stew/Chili 40 minutes 7 - Timing is based on cut-up beef pot roast, but can be adjusted based on your recipe.
Dessert 40 minutes 2 - Timing is based on cheesecake but can be adjusted based on your recipe.
Note: If your recipe calls for more than the time shown above, you can adjust the time. Refer to How to Use Custom Settings.
4. Four dashes will move in a circular pattern on LED display. This notes that the unit is coming up to pressure.
- As the pressure increases inside the unit, it is perfectly normal for traces of steam to escape from the steam-release valve until the pressure indicator pops up. (Keep clear of debris.)
- During pressure buildup/cooking, the cooker may make low clicking sounds. This is normal as the heating element is switching on and off.
5. Once the cooker reaches pressure, the LED display will change to show the cook time.
6. When cooking is complete, 3 audible beeps will occur, and the cooker will switch to Keep Warm mode (except Proof setting). For settings under pressure, you can release pressure in one of the two ways at this time:
- Natural release occurs when the cooking cycle is complete. The Quick Cooker will naturally depressurize as it cools.
- After letting the Quick Cooker naturally release for at least 10 minutes, manually release any additional pressure by pressing the steam-release button.
- If foam comes out of the steam-release valve, press the steam-release button again to close the valve and let the Quick Cooker naturally release for an additional 10 minutes before attempting to manually release again.
- Manual release occurs when you press the steam-release button to release pressure right after cooking is complete.
- If foam comes out of the steam-release valve, press the steam-release button again to close the valve and let the Quick Cooker naturally release for an additional 10 minutes before attempting to manually release again.
 WARNING: After Natural or Manual release, ensure the pressure indicator is down before attempting to open the lid.
7. Press KEEP WARM/CANCEL one time to start Keep Warm mode. The Quick Cooker will remain in Keep Warm mode for up to 4 hours. Press KEEP WARM/CANCEL two times to stop cooking.
OTHER SETTINGS
Delay Cooking
- The Quick Cooker’s Delay Cooking feature lets you schedule a cooking cycle up to 24 hours in advance. This setting works for most settings, as well as custom cooking. You cannot delay Sear, Keep Warm, or Proof settings.
- Select your desired setting or a custom cooking function.
- Press DELAY. The Delay timer defaults to 30 minutes, but you can use the +/- button to adjust.
- Press START. The timer will begin counting down. When the timer reaches zero, it will start the cooking cycle you previously set. Once the cooking cycle is complete, it will automatically switch to Keep Warm mode.
Tips:
- Keep food safety in mind during the delayed start time, as meat, fish, and other perishable foods may spoil or cause illness if delayed for too long at room temperature.
- The Delay time is the time it will take for the Quick Cooker to start the cooking cycle, and does not consider the amount of time it will take to initially heat up the food or release pressure.
Keep Warm
After every cooking cycle is complete (except Proof mode), the Quick Cooker will enter Keep Warm mode, where it will keep your food warm until you’re ready to eat. You will know that the cooking cycle is complete, and warming has begun, when the LED display shows WARMING. The timer will count the minutes that it has been warming for.
You can manually start Keep Warm mode by pressing the KEEP WARM/CANCEL button when in standby mode.
Tips:
- The maximum time the Quick Cooker will stay in Keep Warm mode is 4 hours. After 4 hours, the Quick Cooker will go into Standby mode.
- Foods like rice may overcook or burn on the bottom if held in Keep Warm mode for too long.
TROUBLESHOOTING
The cases in the following tables do not always indicate a faulty cooker. Problem Possible Reason Solution It's difficult to close the lid. Pressure indicator is stuck. Reposition the pressure indicator and try to close the lid again. Silicone ringis not installed properly. Reposition the silicone ring and try to close the lid again. It's difficult to open the lid. The Quick Cooker is still under pressure. Open the lid after the pressure is completely released. Press the steam-release button to release remaining pressure. If no steam comes out after manual release, wait at least 30 minutes after unplugging the unit to attempt to open. If the lid is ever difficult to remove, assume that the unit is still pressurized and do not force the lid open. The pressure indicator is stuck. Contact Pampered Chef at (888) 687-2433 (United States) or (800) 342-2433 (Canada) for assistance. Steam is leaking from the side of the lid. Either the silicone ringis not in place or is improperly installed. Replace or reinstall the silicone ring. There is food debris attached to the silicone ring. Clean the silicone ring and reinstall properly. The silicone ring is damaged. Replace the silicone ring. Back-to-back uses have caused the silicone ringto expand. Remove the silicone ring from lid and place in ice water for a few minutes, drain, and pat dry to replace under lid. Steam is leaking from pressure indicator.
Note: Some steam will leak until cooker comes up to pressure.
There is food debris on the pressure indicator seal. Clean the pressure indicator seal and reinstall properly. The pressure indicator sealis worn out. Contact Solutions Center for replacement seal kit. The lid is not fully closed. Close the lid completely. The pressure indicator won't rise. There's not enough food or water in the inner pot. Add more food and water according to your recipe. Steam is leaking out of one of the seals. Check that all seals are clean, damage free, and have been properly assembled. Steam is leaking from the steam-release valve. Steam-release button is not in the correct position. Be sure that steam-release button is not pushed down. Steam-release valve is not sealing. Disassemble and clean the steam-release valve. Cannot get Quick Cooker to hold pressure. Contact the Solutions Center. Steam continuously comes out from the steam-release valve. The steam-release valveis not in the sealed position. Reposition the steam-release valve. Disassemble and clean the steam-release valve. The electronic pressure control system is malfunctioning. Cease use and unplug the unit. Contact the Solutions Center. The heating element is not heating food. The lid is not closed completely. Attempt to close the lid again. The heating elementfailed. Contact the Solutions Center. Circuit failure Contact the Solutions Center. C1/C2 code is appearing on screen. Bottom sensor failed. Contact the Solutions Center. C5 code is appearing on screen. The temperature of the bottom sensor is too high. Unplug the power supply, and after cooling, switch on again. If product still fails, contact the Solutions Center. C6 code appearing on screen. Pressure switch failure. Contact the Solutions Center. Food is undercooked. There is too little water. Add water accordingly. Rotate Menu Knob to Sear and simmer until desired doneness. Adjust the recipe next time you make this recipe. The cover was opened prematurely. After the cooking cycle completes, leave the cover on for 5 minutes. Food is overcooked. Food was in the Quick Cooker for too long. Adjust cooking time the next time you make the recipe. GUARANTEE
- One-year guarantee for noncommercial use. Refer to sales receipt for details.
Made in China


 Canada (en)
 Germany (de)
 Austria (de)